Schedule a Text Message for a Group
Do you have a short message that you want to send to a segment of your contacts or work group? Email might get ignored, but this message is important, so sending via SMS (text) message is potentially the best solution to alert them to the information. Use an automation to schedule that text message!
Of course, if your group prefers email delivery, or if you don't have mobile numbers for your group, the process described below also works for the send email automation.
Scenarios:
send an important product update to sales staff
quickly communicate a correction or new piece of information to the team
send a link to a positive article or review to your team and celebrate a win!
announce new team members, or a last minute change in a meeting schedule
send a photo or relevant screenshot to start a discussion
Sending a Text Message to an Existing Group - Overview
To Review: In Automations > Select New Automation at the top right of the screen
Select "Create" for Send New Text Message
Add a name for this automation like "send photo to the team"
Select your group to receive the message
Select a time in the near future to (default is today's date and choosing time to release) or select a different date in the future, select a time, and timezone for the message to release.
Select Once in How will automation run, and this will send the message only once to the people in your selected group.
Then, just set your message, and upload the image you wanted to share with them.
Click Review at top right, and ensure the time, date, and contacts affected matches your intent. If so, hit the Launch button at top right. If not, then use the back arrow to go back and make appropriate adjustments.
But what if you haven't created this group yet? You can follow the same procedure above - but establish the group as you work....
Sending an Automated Text Message to a New Group
For example, you can quickly create a group from your campaign/course participants and schedule to text message using an automation:
Setting up a group on demand requires creating conditions that match the group you wish to send to. In other words, you are training the program to look for certain attributes, and create a group from those attributes.
Note: The process below would also apply to scheduling an email blast - you would simply select "Send Email" as your automation type.
In Automations > Select New Automation at the top right of the screen
Select Create for Send New Text Message
Add a name for this text message automation like "For Developers"
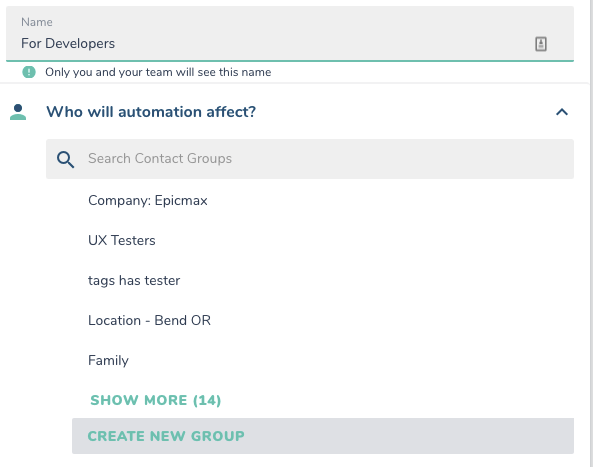
Now let's create a group from an attribute that is in common for all team members. Select: Create New Group
For example - if I worked with a team of developers, and my company database of contacts had assigned the roles for each person in the data fields, then I would be able to create a group based on 'role is developer'.
This would look like:
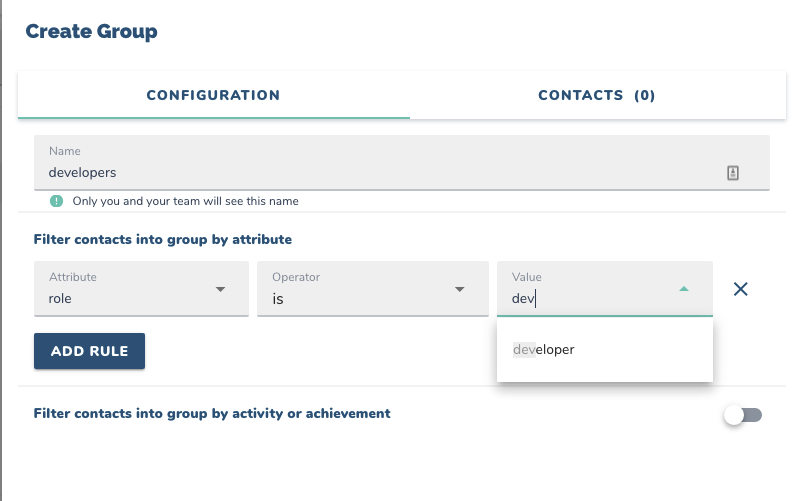
Create Group
Give this group a name in the top zone (such as developers)
Attribute - set to 'role'
Operator - set to 'is'
Value - find the development team - if the roles have already been assigned to your list of contacts. Start typing 'developer' d...e....v... and then select 'developer' from the droplist that is pulling from my existing data:
Then check in the contacts selected to see if those selected make sense for your group:
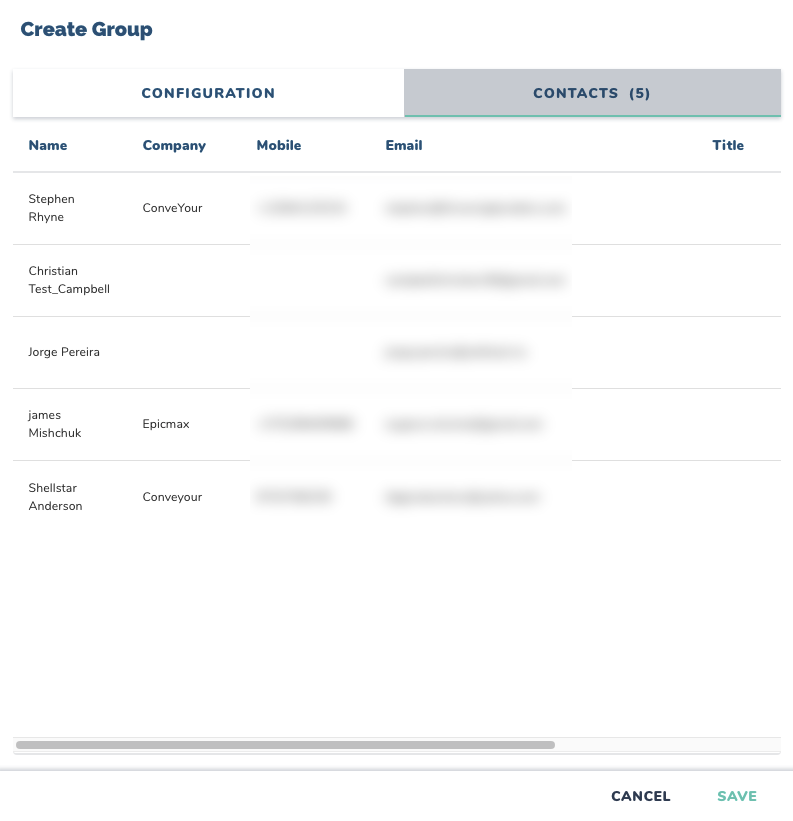
And if so... Save this group.
NOTE - if you don't already have an attribute included in your contact list, such as role - then you can look for other attributes your team has in common. You have the choice of create a new field for the database called 'role' and add everyone's role...
Or - you can assign a custom "tag" to only those team members you want to reach out to in your contact list - and then follow the same process using "tags" as the Attribute.
Learn more about adding custom tags here.
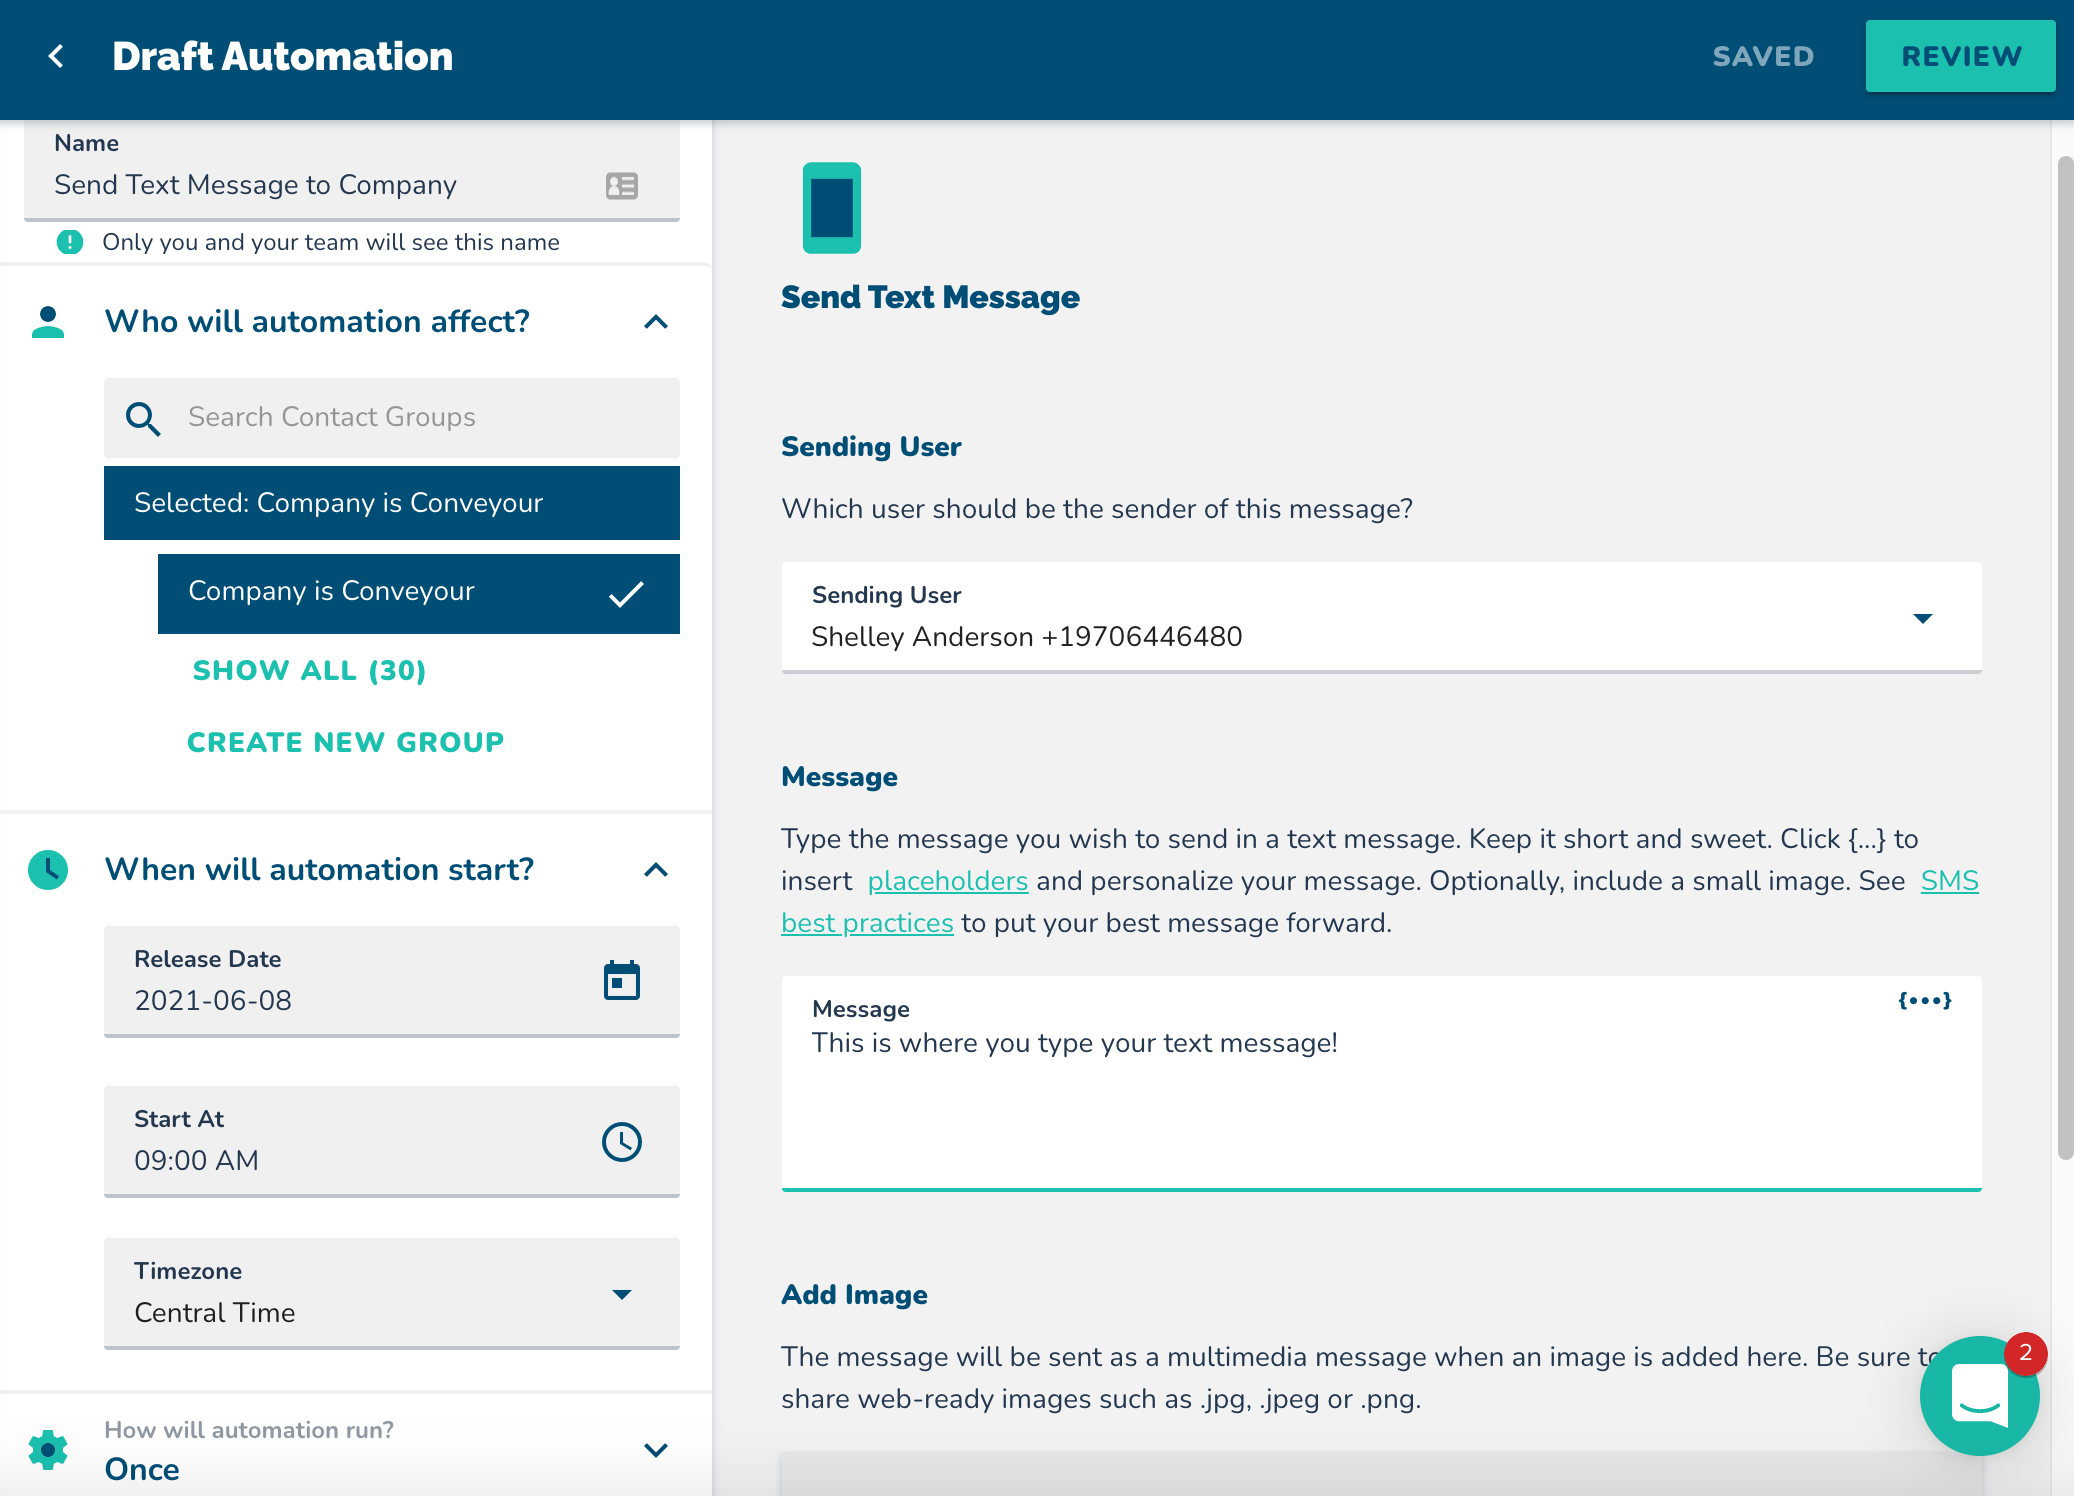
Once you have created the group - notice it is the one selected at top and highlighted in blue:

Then following the procedure to schedule the text automation as shown in the video above, schedule the date, time, time zone, and frequency of this message in the left panel.
Then type your message in the authoring panel at right, where it indicates "Message".
When you've set your message and timing options for the automation, click "Review" at top right - to check when the automation is scheduled, and to whom:

if all information checks out, click LAUNCH at top right!